After upgrading your Windows Server package, you may need to manually utilize the additional disk space, as resources like RAM and CPU are adjusted automatically. This guide will walk you through the process of expanding your existing drive to take advantage of the newly available disk space.
Extending the Drive
Connect to Your Server:
- Log in to your Windows Server via Remote Desktop (RDP). For guidance on connecting via RDP, refer to the relevant tutorial.
Open Disk Management:
- From the Windows Server desktop, open Server Manager.
- Navigate to Tools > Computer Management.
Access Disk Management:
- In the left pane, expand the Storage section and select Disk Management.
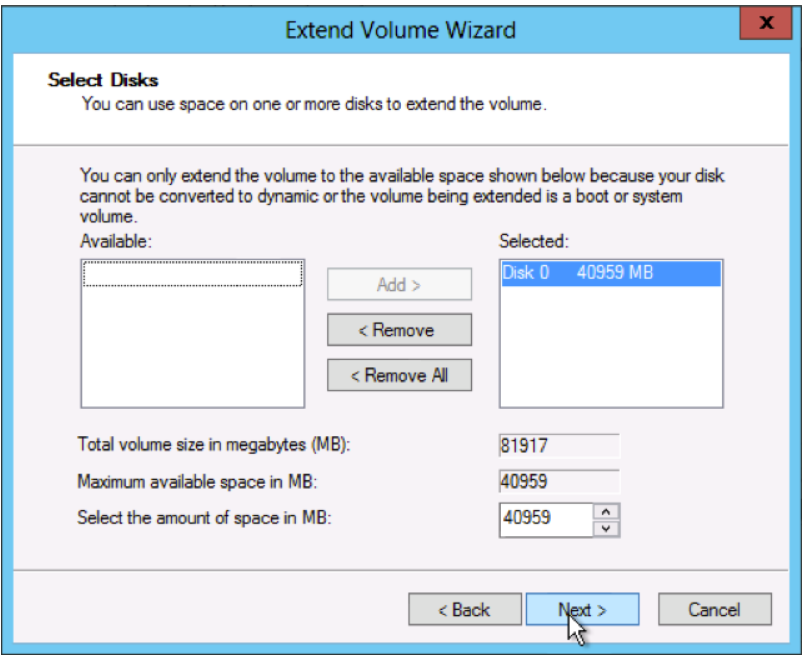
Extend the Volume:
- In Disk Management, locate and right-click the C: drive (or the drive you want to extend).
- Select Extend Volume from the context menu to open the Extend Volume Wizard.
- Click Next to proceed.
Add Available Space:
- To utilize all available space, accept the default settings and click Next.
- The C: drive will expand to include the newly available space.
- Complete the Process:
- Click Finish to apply the changes.
Verifying Disk Space
- Check Disk Management:
- Return to Computer Management via Server Manager.
- Verify that the C: drive now reflects the increased disk size in Disk Management.
Your disk space is now extended, and the additional volume is available for use.