In this guide, we’ll walk you through the process of installing Internet Information Services (IIS) on your Windows VPS server and setting up your first website. This tutorial applies to Windows VPS servers running versions 2008 or 2012.
Step 1: Installing IIS on Your Server
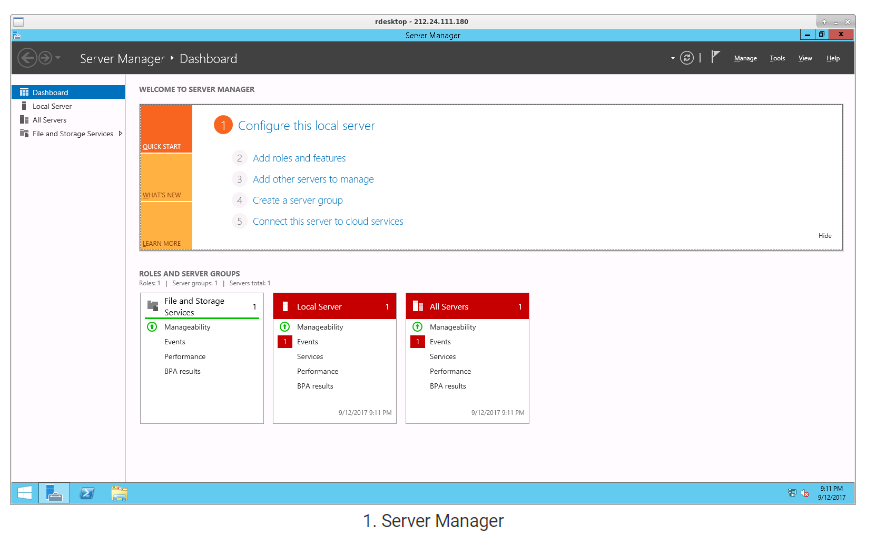
- Open Server Manager: Start by launching the Server Manager and selecting the Dashboard on the left side.
- Add Roles and Features: Click on "Add roles and features" to begin the installation process.
- Proceed with the Installation Wizard: Click "Next" to move through the initial steps of the wizard.
- Select Installation Type: Choose Role-based or feature-based installation and click "Next."
- Choose Server: Select Select a server from the server pool and press "Next."
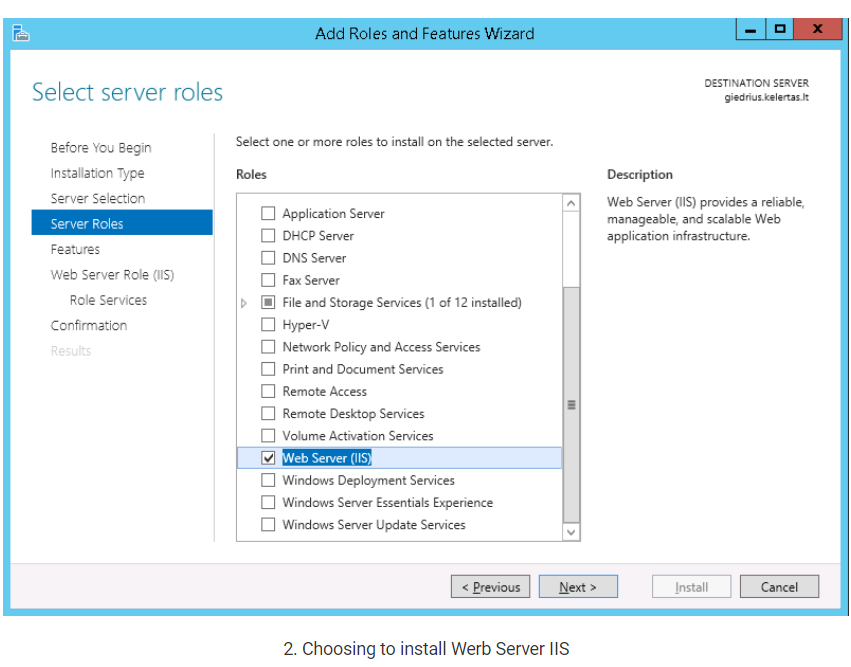
- Select Web Server (IIS): In the list of roles, check the box for Web Server (IIS) and click "Next."
- Optional Features: The next screen allows you to select additional features. Only choose these if necessary, then click "Next."
- Install IIS: Click "Install" and wait for the installation to complete. Once finished, click "Close."
Step 2: Accessing the IIS Interface
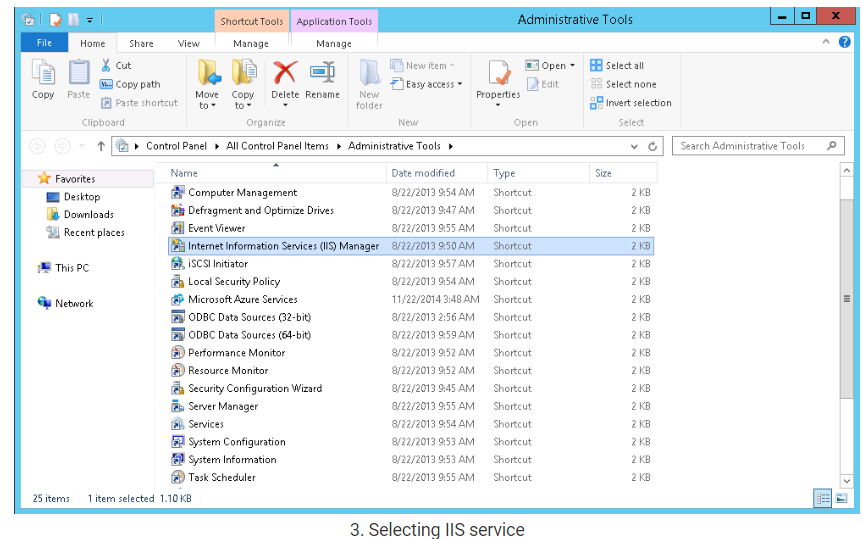
- Open Control Panel: Navigate to your Control Panel.
- Select Administrative Tools: Click on Administrative Tools.
- Open IIS Manager: Choose Internet Information Services (IIS) Manager to open the IIS interface.
Step 3: Adding a New Website
- Add a Website: In the IIS Manager, right-click on Sites and select Add Website.
- Configure Website Settings:
- Site name: Enter the name of your website.
- Physical path: Create and select a folder where your website files will be stored.
- Type: Choose either http or https depending on your site’s needs.
- IP address: We recommend selecting your server’s IP address, although All unassigned is the default.
- Port: The default port is 80, which is generally recommended.
- Host name: Enter your website’s domain name (e.g.,
yourwebsite.com).
- Finalize: After entering all the information, click "OK" to create the website.
Step 4: Configuring the Server
After setting up your website, you need to configure your server to make the site accessible online.
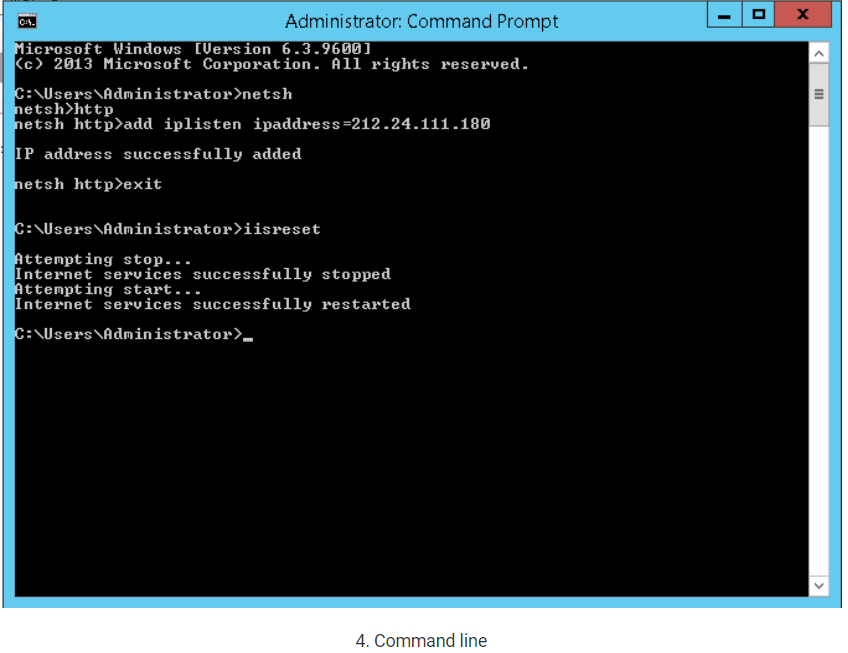
- Open Command Line: Open the command line on your server.
- Enter Commands: Type the following commands, replacing "X.X.X.X" with your server’s IP address:
netsh
http
add iplisten ipaddress=X.X.X.X
exit
iisreset
- Apply Changes: These commands will configure the server to listen to the specified IP address and reset IIS to apply the changes.
Step 5: Verify Your Website
You’ve now installed IIS, set up your website, and configured your server. Your website should be accessible online.