In this guide, we’ll walk you through the steps to set up and configure an FTP server on your Windows Server using FileZilla Server software.
Step 1: Download and Install FileZilla Server
Start by downloading the FileZilla Server installation file from the official site:
Download FileZilla Server
Once downloaded, run the installation file to launch the installation wizard. In the first window, simply click "Next" to proceed with the installation.
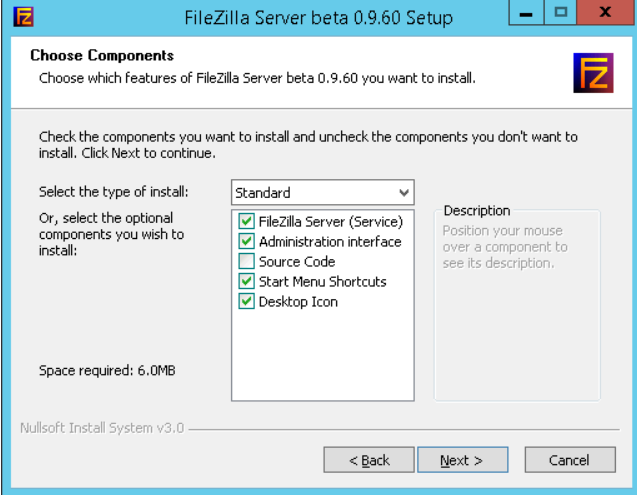
Step 2: Configure Installation Options
During the installation, you’ll encounter a window with various configuration options. We recommend keeping the default settings unless you have specific requirements. Here’s an example of what this screen looks like:
After configuring these options, click "Next" to move on to the next step.
Step 3: Choose Installation Location
Next, you’ll be prompted to choose the installation location for FileZilla Server. Select your preferred location and click "Next."
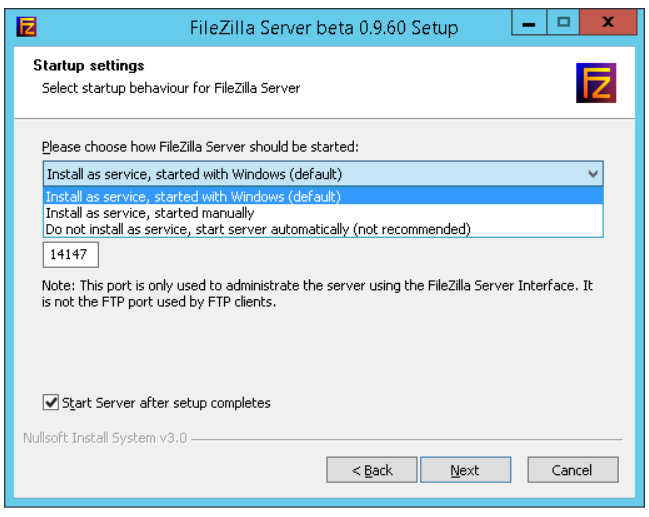
Step 4: Select Startup Preferences
You’ll then need to decide how FileZilla Server should start (Automatically, Manually, or as a standard application). Here’s what this selection window looks like:
Once you’ve made your selection, click "Next."
Step 5: Configure Interface Launch Settings
In the following window, you can choose when the FileZilla Server interface should open:
After configuring this, complete the installation. The FileZilla interface should launch automatically, and you’ll see the following window:
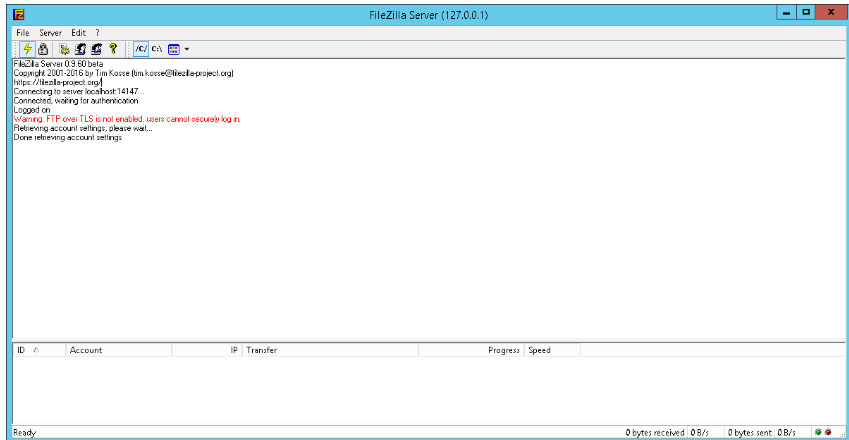
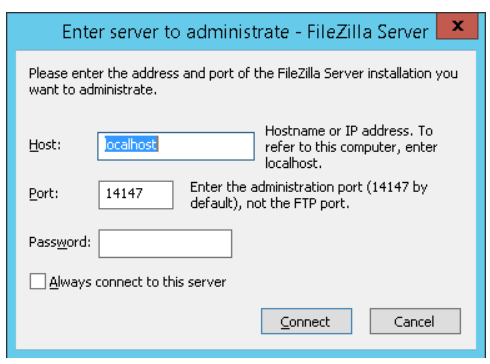
Step 6: Configure Localhost Settings
In this window, it’s best to leave the default option selected. This setting means your FTP server will operate on localhost, which is ideal for the initial configuration. The main interface is straightforward, offering all the necessary options:
Step 7: Add Users to Your FTP Server
With the main interface open, the next step is to create users who can connect to your FTP server. To do this, go to the top menu and click Edit > Users. You’ll see a screen like this:
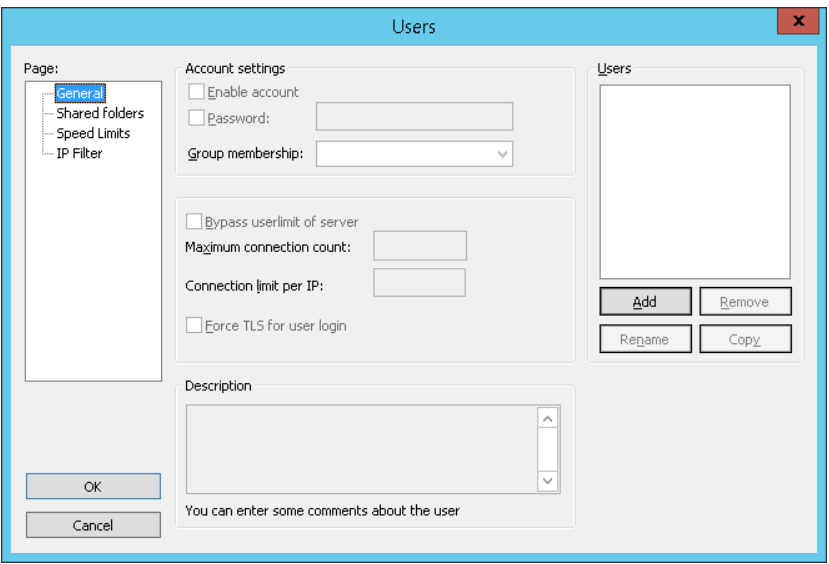
Click the "Add" button to create a new user.
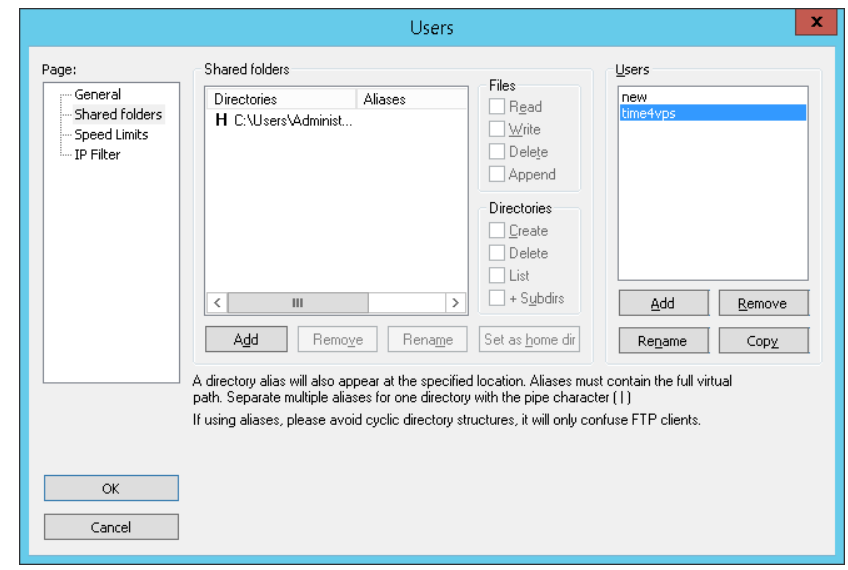
Step 8: Assign Shared Folders and Permissions
Once the user is created, assign a shared folder that the user can access. You’ll also need to set the appropriate permissions (Read, Write, Delete, etc.). This can be done by selecting "Shared folders" on the left side of the interface:
Step 9: Modify Windows Firewall Settings
Since Windows Server tends to block most connections, you’ll need to allow the FileZilla Server software through the Windows Firewall (both Inbound and Outbound connections) to ensure that your FTP server functions correctly.
Don’t forget to make these firewall changes, or your users may not be able to connect to the server.
Additional Resources
For more detailed information and advanced configuration options, visit the FileZilla Community Forum.